
How to Make a Leather Hooded Cloak: A Step-by-Step Guide

Creating a leather hooded cloak adds a rugged, stylish element to your wardrobe, perfect for cosplay, medieval events, or simply making a fashion statement. This guide will walk you through making your own leather hooded cloak, ensuring it is both functional and eye-catching.
Materials You Will Need:

- Leather Fabric: Choose a soft, pliable leather, such as cowhide or lambskin. Pure cow leather is ideal for durability and texture.
- Lining Fabric (optional): Satin or a soft cotton lining can add comfort and warmth.
- Leather Sewing Machine Needles: Strong needles designed for sewing leather.
- Heavy-duty Thread: Matching color to your leather, designed specifically for leather stitching.
- Scissors: Sharp fabric scissors, ideally those designed for cutting leather.
- Measuring Tape: For accurate measurements.
- Clips: Use clips instead of pins to avoid leaving holes in the leather.
- Chalk or Fabric Marker: For marking cutting lines on the leather.
- Pattern Paper: To draw out your pattern.
-
Closures: A strong clasp, metal buckle, or leather tie for the front.
Step-by-Step Instructions:

Step 1: Measure and Plan
- Measure Your Height: This will determine the length of the cloak. Measure from the nape of your neck to your desired length (e.g., ankle-length or knee-length).
- Measure Your Hood: Measure around your head from shoulder to shoulder, over your head, to get the hood’s length and width.
-
Decide on the Width: For leather, less fullness may be preferable due to weight. Typically, the width is about one and a half times your shoulder measurement.
Step 2: Create a Pattern

- Draw the Cloak Shape: On your pattern paper, draw a large semi-circle or quarter-circle for the leather cloak. The straight edge will be the top of the cloak, and the curved edge will be the bottom.
- Draw the Hood: Draw a rectangle for the hood, based on your head measurements, adding an extra inch for seam allowance.
-
Add Seam Allowances: Add at least half an inch around all pattern pieces for seams.
Step 3: Cut Out the Leather
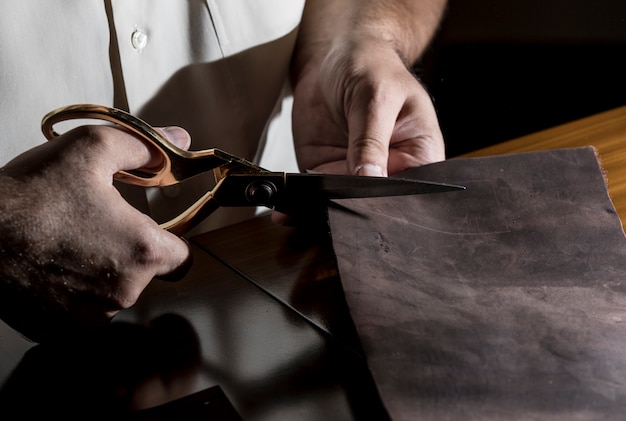
- Lay Out the Leather: Place your leather flat on a large surface. If it's folded, make sure the right sides are facing inward.
- Clip the Pattern: Use clips to hold your pattern to the leather securely.
-
Cut the Leather: Cut along the pattern lines carefully. Leather is more challenging to cut than fabric, so take your time.
Step 4: Sew the Hood
- Clip the Hood Pieces Together: With the right sides facing, clip along the top curved edge of the hood.
- Sew the Seam: Using a leather needle and heavy-duty thread, sew the top seam of the hood. Use a longer stitch length to avoid perforating the leather.
-
Hem the Hood Opening: Fold the raw edge of the hood opening inward and sew a hem to finish the edge neatly.
Step 5: Attach the Hood to the Cloak
- Find the Center: Mark the center of the cloak’s top edge and the center of the hood’s bottom edge.
- Clip the Hood to the Cloak: Align these center points and clip the hood to the cloak, right sides facing each other.
-
Sew the Hood to the Cloak: Sew along the clipped edge, attaching the hood to the cloak. A strong seam here is crucial for durability.
Step 6: Finish the Edges
- Hem the Cloak’s Bottom: Fold the raw edge of the bottom of the cloak inward and sew a hem to finish the edge. Leather edges may not fray but hemming provides a finished look.
-
Sew the Front Edges: Fold and hem the front edges of the cloak for a clean finish.
Step 7: Add a Closure
- Choose a Closure: A sturdy clasp, metal buckle, or leather tie can secure the cloak.
-
Attach the Closure: Sew or attach your chosen closure method securely at the neck.
Tips for Working with Leather
- Use Specialized Tools: Leather requires special needles and thread. Ensure your sewing machine can handle leatherwork.
- Avoid Pins: Use clips to hold pieces together to prevent making holes in the leather.
-
Leather Care: Use a leather conditioner to keep the cloak soft and pliable. Avoid excessive moisture.
FAQs
Q: How much Leather do I need for a Hooded Cloak?
A: The amount of leather needed will vary based on the cloak's size and length, but generally, 2-3 yards of leather will suffice for a full-length cloak.
Q: Can I make a Leather Cloak without a Sewing Machine?
A: Yes, but hand-sewing leather is time-consuming and requires strong hand stitching techniques and tools like leather needles and waxed thread.
Q: What type of Leather is Best for a Cloak?
A: Soft cowhide or lambskin is ideal due to their flexibility and comfort, while still being durable.
Q: How do I care for a Leather Cloak?
A: Keep the leather clean by wiping it down with a damp cloth. Use leather conditioner regularly to maintain its softness and prevent drying out. Store it away from direct sunlight and in a cool, dry place.
By following these steps, you can create a beautiful and durable leather hooded cloak that will be both functional and stylish. Enjoy your crafting!
Leave a comment
Search Blogs
Our Recent Blogs

Fit and Flare Mini Dress: Style Guide & Outfit Ideas
Discover the best fit and flare mini dress styles with outfit ideas for casual days,...
Read More
Women’s Trendy Fashion Clothing for Stylish Modern Looks
Discover women’s trendy fashion clothing with practical styling tips, modern outfit ideas, wardrobe essentials, and...
Read More
How to Style Leather Shorts: Chic Outfit Ideas for Women
Explore two piece short sets for women with bold leather styling, matching tops, flattering shorts,...
Read More
POST COMMENTS